In this guide, I will walk through the entire process of setting up your own WordPress server on an Oracle Free Cloud instance. I’ll cover configuring the instance, installing the necessary server software, setting up DNS and dynamic DNS updates, and securing the installation with SSL.
Prerequisites
- An Oracle Cloud account with a free tier available
- A domain name of your choice managed through GoDaddy
- The courage to type Linux shell commands, edit Apache files, and issue MySQL commands
If it sounds daunting, don’t worry. Just step through the guide and you will have your own website up and running in no time. I will cover more advanced topics such as managing and backing up your servers and websites at a later date.
Step 1: Setting Up the Oracle Cloud Instance
Log in to your Oracle Cloud account and create a new Ubuntu instance.
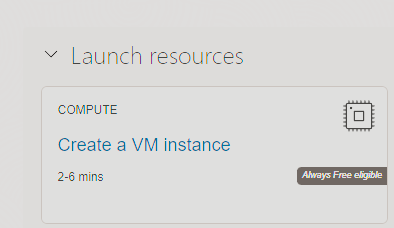
- On the start page Click the “Create a VM instance” button and follow the wizard
- The only thing you need to change on the following screen is the image. Change it from Oracle Linux 8 (at the time of writing) to Ubuntu 22.04 Minimal (at the time of writing, choose the latest available Minimal version instead)
- If you have no other Free Tier resources yet, sticking to the defaults here will give you a free VM Instance (Translation: A free cloud-based computer hosted by Oracle Cloud, that you can access)
- Following the Oracle wizard will also let you create a name and compartment of your choosing if one does not exist yet.
- It will also set up a network for you. Please make sure you choose “Assign a Public IPv4 Address:” Yes
- Very Important: Save the Private key now before you click anything else, this is your only way of accessing the server after it is created, and cannot be retrieved afterwards to help you keep your servers secure. In that same breath, save it in a secure location that only you (or those you trust explicitly) can access and be sure to create a backup that only you (or those you trust explicitly) can access.
- All your settings should look something like this
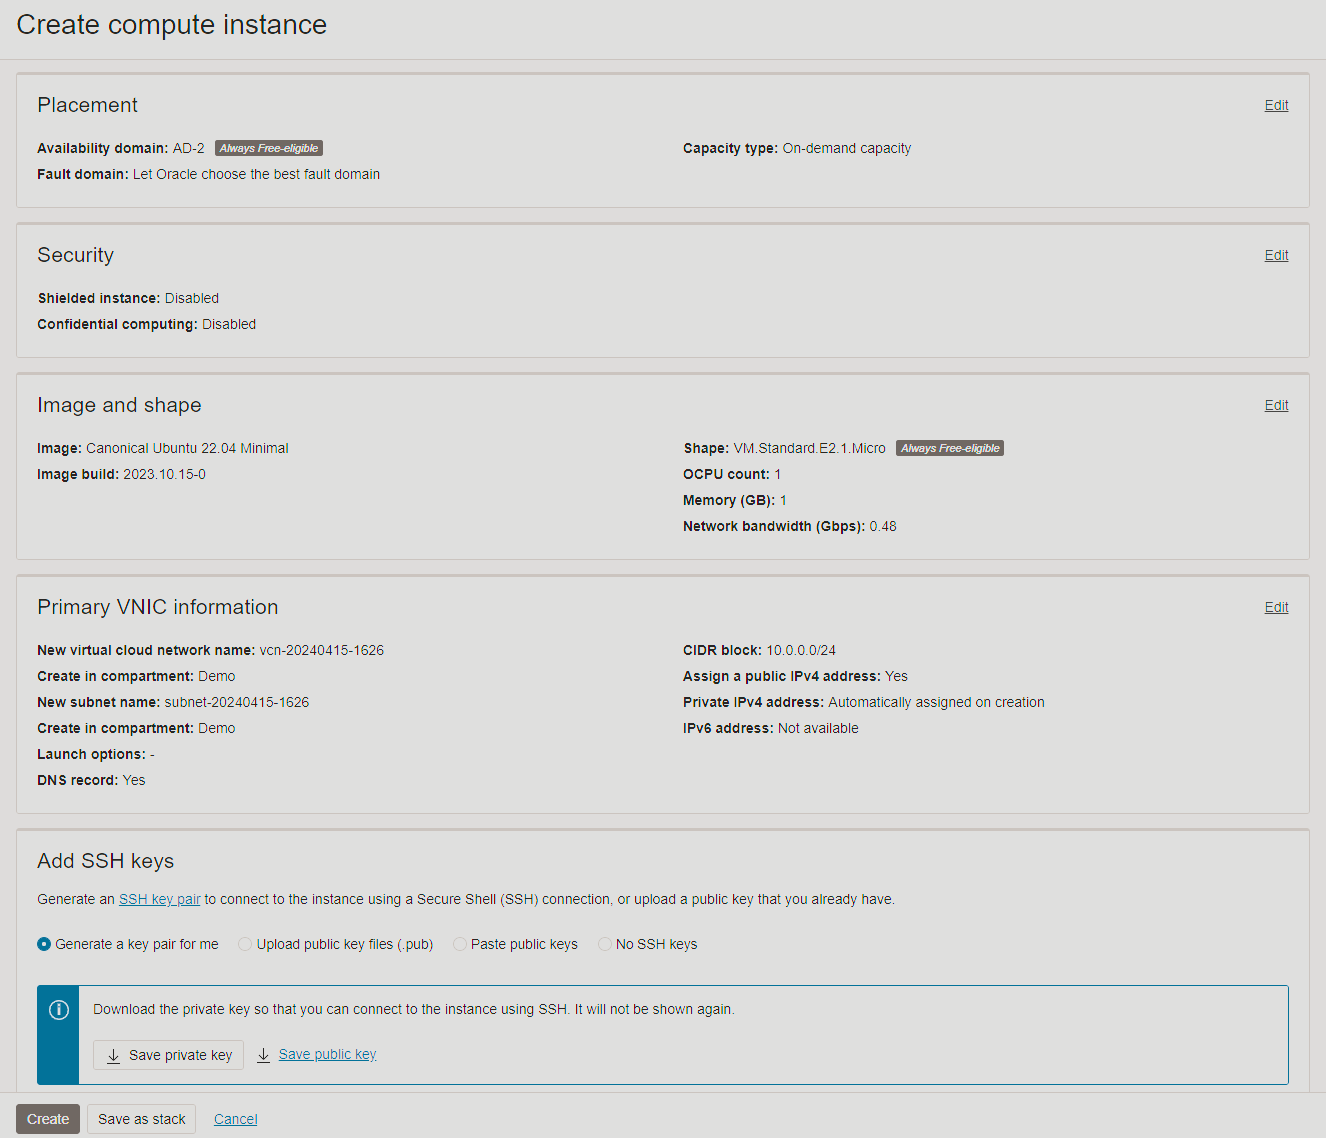

- Now you can go ahead and click “Create” in the bottom left corner, it will take a few minutes to provision your instance.
Sign in to your shiny new Ubuntu Instance
To sign in to your newly provisioned Ubuntu Instance, note the assigned public IP Address of your instance and use a variation of the following command (replacing 192.168.0.1 with the public IP address of your instance and the file path with the location of your private key file generated during the deployment of your instance):
ssh ubuntu@192.168.0.1 -i "C:\**file path**\ssh-key-2024-04-15.key"- On Windows I recommend using PowerShell.
- On Linux you most likely already have your own favourite terminal application, otherwise just hit Ctrl+Alt+T to bring up the default terminal for your desktop environment.
After signing in, you will have to run the following commands before continuing with any other steps.
If you are not already on the same computer as this guide, I would suggest opening this guide on the same computer so you can copy and paste these commands one-by-one from the guide to the terminal you just opened. Hitting ‘Enter’ after each command is pasted, and following any on screen prompts you may receive. At this point of the guide you will be following all the suggested defaults (which are already pretty good).
#To update the list of software packages available to your device
sudo apt update#To ensure the dialog & cron packages are installed so you can follow prompts and schedule jobs later, for some reason this was not installed on my instance
sudo apt install dialog cron#To upgrade all the installed software packages to their latest available versions
sudo apt upgrade#To apply any system packages (particularly the Kernel) you will reboot the instance. It is completely normal for you to lose connection to the server as it is restarted. Please wait a few minutes then reconnect using your modified SSH command from above.
sudo reboot#Install a basic terminal text editor to help you create files later
sudo apt install nanoStep 2: Configuring the Firewall
Before you start installing the web server and database, you first have to configure your firewall to accept incoming traffic on the HTTP and HTTPS ports by default. Since you are working with a cloud server there are 2 places that must be configured for the change to be affective. In the cloud server network, and on the server itself. Think of the former being like your home router, and the server itself one of the computers behind your home router. Both the router and the computer must accept connection for the connections to work properly.
On the Cloud server network
You can find this easily by clicking on the navigation menu at the top left of your Oracle Cloud Home Page. Then clicking on the “Compute” menu item. Then clicking on the Instances item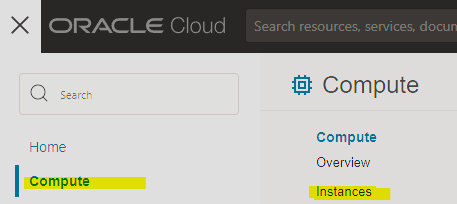

Once there you will be able to find the instance you create in step 1 by choosing the Compartment, and selecting it from the list appearing in the centre of your screen. Click on the name of your instance.
A new screen will load, with all the details of your cloud instance displayed nicely. Feel free to bookmark this page if you don’t want to be troubled finding it again.
Towards the bottom of the current screen, by scrolling down slightly, you will see a link for “Attached VNICs” (Translation: Attached Virtual Network Interface Cards). Click on it.
A new list will be loaded showing your instance’s network interfaces. If you are following along with his guide, you will see only one network interface, click on its subnet. it will look something like this: 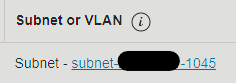

Another new screen will load, here you will see a “Default Security List”, click on it, and a new list with IP Addresses, source ports, destination ports, etc. will be displayed. You need to add 2 new rules to this list. Start by clicking “Add Ingress Rules”, and filling in the following details:
- Source Type: CIDR
- Source CIDR: 0.0.0.0/0
- IP Protocol: TCP
- Source Port Range (Optional): Leave Blank
- Destination Port Range (Optional): 80, 443
- Description: Allow incoming traffic for HTTP(S) connections
Click “Add Ingress Rules” and you will see two new rules in the list, one for Destination Port Range: 80, and one for port 443.
This part of the setup is now done.
On the cloud instance
Using the same SSH Connection from the end of Step 1 log in to your cloud server. You will be greeted with the famous green text of an Ubuntu terminal if you have already signed in.
Here are the iptables commands to allow traffic on ports 80 and 443:
# Accept incoming connections on the http port: 80
sudo iptables -I INPUT 6 -m state --state NEW -p tcp --dport 80 -j ACCEPT# Accept incoming connections on the https port: 443
sudo iptables -I INPUT 6 -m state --state NEW -p tcp --dport 443 -j ACCEPT# Save the rules you just added so that they will be applied everytime the server starts
sudo netfilter-persistent saveThis configuration now allows incoming web traffic which is essential for a web server.
Step 3: Installing Apache2 and MySQL
Install Apache2, php, and, MySQL
To install the backend that will serve your WordPress site and manage the website database:
# Update your package list
sudo apt update# Install Apache2, php, and, MySQL server
sudo apt install apache2 php mysql-server# Set the apache2 service to start automatically when the server is started
sudo systemctl enable apache2# Restart the apache2 service to ensure it's up and running as expected
sudo systemctl restart apache2# Optional: at this point you can check the php version installed by running
php -v# Install the php extensions recommended for WordPress
sudo apt install php-mysqli php-curl php-gd php-zip php-dom php-imagick php-mbstring php-intlAt this point you should check that your webserver is accessible from the internet. You can do so by adding a file called info.php with the following:
- Create the file
# Create an empty file called info.php using nano
sudo nano /var/www/html/info.php- Add this text into the file copied exactly as here:
<?php
phpinfo();
?>- From your computer, open a new browser tab and use the Public IP Address navigate to a modified version of this web address: http://192.168.0.1/info.php (Replace 192.168.0.1 with the Public IP Address of your server). If all has gone as expected, you should see a basic webpage describing the PHP version you just installed. If it does not go as expected, please go back to Step 2 and ensure you have completed all the steps.
- Finally, go back to the terminal of your cloud server, and issue this last command to delete the info.php file, so that hackers and other nefarious characters can’t easily collect information about your server
# Delete the info.php file
sudo rm /var/www/html/info.php
Configure the MySQL server more securely
Here you will start the configuration of a more secure MySQL database server by following the secure installation wizard and then setting the admin user of the MySQL database server to only be accessible from the cloud server itself.
# Log into the MySQL server
sudo mysql-- Change the password of the admin user, you will need to create your own password by replacing <your-password>
ALTER USER 'root'@'localhost' IDENTIFIED WITH mysql_native_password BY '<your-password>';-- Exit MySQL by manually typing exit
exit# Start the Secure MySQL installation wizard.
sudo mysql_secure_installation- You will have to enter the root password you just set.
- Turn on Password Validation by typing Y and pressing Enter when prompted
- Select the password validation level STRONG by typing 2 and pressing Enter when prompted
- Change the root password by typing Y, pressing enter and following the on screen instructions. Note; it is normal to not see the typed password; Note; you will be replacing the password you set earlier.
- Choose Y for all the remaining security options:
- Remove anonymous users?
- Disallow root login remotely?
- Remove test database and access to it?
- Reload privilege tables now?
At this point when the wizard finishes, your should be sent back to the normal terminal, if not, manually type ‘exit‘ before continuing with the next steps.
Finally, you can set the last security option for MySQL to allow you to login using the sudo command:
# Log in to MySQL using the root user, you will be prompted for the password you set during the secure installation wizard
sudo mysql -u root -p-- Set the root user to authenticate using the local root user
ALTER USER 'root'@'localhost' IDENTIFIED WITH auth_socket;-- Exit the MySQL prompt
exitNow you are ready to start configuring your DNS, and then you can install WordPress.
Step 4: Configuring DNS with GoDaddy
Log in to your GoDaddy account, navigate to your domains, click manage on the domain you want to give your website (now would be a good time to get a domain if you do not already have one, see the side note if you want a free option). Once you reached the screen where you can configure your domain’s DNS, set up an A record, with Name = @, pointing to your Oracle Cloud instance’s public IP address. It will look something like this (replacing 192.168.0.1 with your own Oracle Cloud Instance’s public IP address as in the prior examples):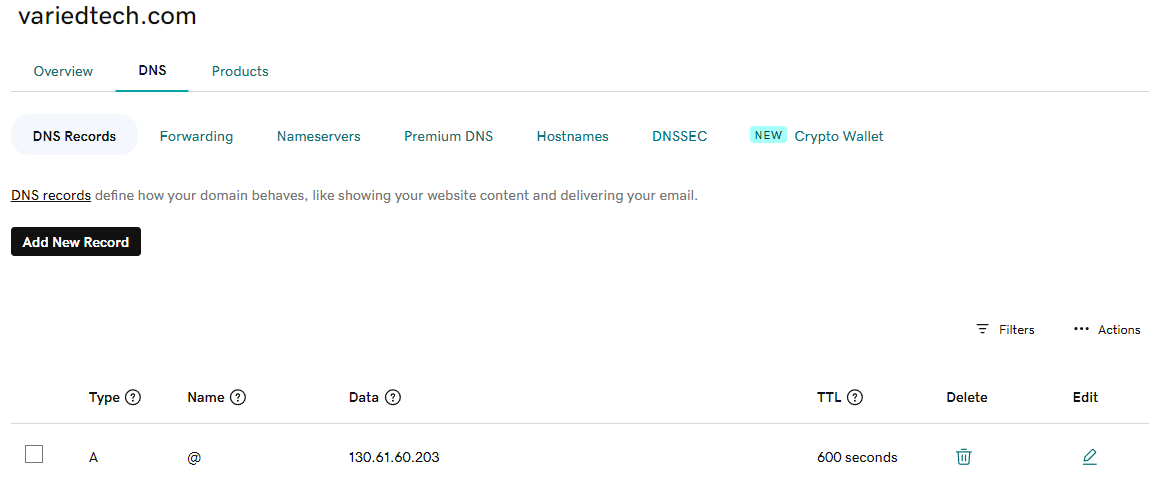

Also add a new CAA type record for the Let’s Encrypt. You will need this in Step 7 in order to request a Let’s Encrypt SSL Certificate. It looks like this:

Once this is done, your server will now have a name like any other website, which clearly beats remembering a jumble of numbers that may or may not change over time. In the next step you will set up a script on your server, that will automatically update this recorded IP in case it ever changes.
For more in depth information on why this is important, please check the references to the article I initially followed to get it working properly.
Step 5: Dynamic DNS Configuration
Because I am cheap and don’t like spending more than I have to (Translation: Thrifty, Frugal or Prudent). I came up with a way to avoid paying for a fixed, unchanging Public IP Address. In theory, this method has 2 basic steps.
- Check if the public IP has changed. If yes, move on to the next steps. If no, do nothing.
- If yes, record the new IP address, and pass this new IP address to GoDaddy via the API they provide for managing DNS entries.
In practice, I have copied and modified this script from an Instructables.com article (linked below) to do these steps for me. And then scheduled it to run every 10 minutes.
For you to implement this Dynamic DNS setup you will need an API key from GoDaddy:
- Make sure you are signed into GoDaddy with the account that owns your domain, and then navigate to https://developer.godaddy.com/keys.
- On this screen click the “Create New API Key” button.
- I gave it the name “DynDNS”, but you can call it whatever you like
- Choose “Production” and click next
- Another important pause moment: Copy the secret and save it in a secure location that only you (or those you trust explicitly) can access and be sure to create a backup that only you (or those you trust explicitly) can access. It will not be shown again as noted in the warning you will receive.
- After saving the Secret, click the “Got it!” button. You now have an API Key, and secret that you can use to interact with your DNS entries from any computer that is connected to the internet. PSA: this can be a security risk if your secret is ever discovered so treat it the same way you would treat any other sensitive passwords, like the password to your internet banking profile.
Now, you are ready to implement the script that will manage the DNS updates for you by logging in to your Cloud server, if you are not already logged in, and issuing the following commands:
- Create a script in the default home directory file called
RefreshDNS.sh
# Open nano with a file RefreshDNS.sh in the default user's home directory '/home/ubuntu'
nano /home/ubuntu/RefreshDNS.sh- This will open the nano Text editor you installed way back in Step 1, with an empty text file that will be created when you save it. In this file paste the following text, taking care to replace the values specified:
#!/bin/bash
# You need to do 3 replacements in this file
# 1. set mydomain = to your own domain name
# 2. replace <your_api_key_here> with your API Key from GoDaddy
# 3. replace <your_secret_here> with your API Secret that you saved from GoDaddy

mydomain="example.com"
myhostname="@"
gdapikey="<your_api_key_here>:<your_secret_here>"
logdest="local7.info"

myip=`curl whatismyip.akamai.com`
dnsdata=`curl -s -X GET -H "Authorization: sso-key ${gdapikey}" "https://api.godaddy.com/v1/domains/${mydomain}/records>
gdip=`echo $dnsdata | cut -d ',' -f 1 | tr -d '"' | cut -d ":" -f 2`
echo "`date '+%Y-%m-%d %H:%M:%S'` - Current External IP is $myip, GoDaddy DNS IP is $gdip"

if [ "$gdip" != "$myip" -a "$myip" != "" ]; then
  echo "IP has changed!! Updating on GoDaddy"
  curl -s -X PUT "https://api.godaddy.com/v1/domains/${mydomain}/records/A/${myhostname}" -H "Authorization: sso-key ${>  logger -p $logdest "Changed IP on ${hostname}.${mydomain} from ${gdip} to ${myip}"
fi- Exit Nano with
Ctrl+X, it will ask you toSave modified buffer?, which you should confirm by pressingY. - Now you have a script file called
RefreshDNS.sh, make it executable by adding the Execute permission with
# Use chmod to add the execute (+x) permission to the script file you created
chmod +x /home/ubuntu/RefreshDNS.sh- Test it by trying to execute the script manually first. If it fails, check the content of the
RefreshDNS.shfile using nano as in 2., and make sure you added the Execute permission as in 4.
# Manually execute the script by calling the script file directly
/home/ubuntu/RefreshDNS.sh- Finally, add it to the job manager, cron, by
# Open the root user's crontab using sudo
#If it asks, choose the option with "nano" in it as your default cron text editor
sudo crontab -e#Add the following line as its own new line to the bottom of the file
*/10 * * * * /home/ubuntu/RefreshDNS > /dev/nullThis line adds a job for the server’s root user to execute the script you created every 10 minutes. And sends the result to the /dev/null pipe so that success/error messages are not shown every time it runs and it doesn’t fill up logs unnecessarily. In order to change the timing, simply update the line to your desired time window. You can use crontab.guru to simulate your change.
- Finally save the crontab by exiting nano with
Ctrl+X, and pressingYto save it.
Now you have a server that can be reached from the internet with a domain name of your choice, that is protected against random IP changes/updates.
Step 6: Installing WordPress
Download and get the WordPress website files ready by issuing the following commands, in order, on your Cloud server.
# Navigate to the default html directory, this is where you will download and install WordPress
cd /var/www/html# Download the latest version of WordPress from the official WordPress repository
sudo wget https://wordpress.org/latest.tar.gz# Extract the archive you downloaded from WordPress
sudo tar -xzf latest.tar.gz# Move the files from the extracted directory/folder called wordpress to the /var/www/html directory
sudo mv wordpress/* .n# Delete the file/archive you downloaded since you already got the files inside it and it is no longer required
sudo rm -rf wordpress latest.tar.gzCreate and configure the MySQL database that your WordPress installation will connect to:
# Start a MySQL session by logging in with the root user
sudo mysql
Create a database called "WordPressDB"
create database WordPressDB;Create a new database user with a unique password that will only have access to the "WordPressDB" database. Remember to save your password in a safe place. It can be recovered later if you misplace it by resetting the user's password. It can be any name and password, as long as it sticks to the password rules set for MySQL
CREATE USER '<your-user-name>'@'localhost' IDENTIFIED BY '<your-password>';Grant the new user access to the "WordPressDB" database
GRANT ALL PRIVILEGES ON WordPressDB.* TO '<your-user-name>'@'localhost';Check that the database exists and that it is up and ready
show databases;Reset the privileges (access) to the databases to make sure it is ready to receive a connection from the new user you just created
FLUSH PRIVILEGES;Exit the MySQL session by typing exit
exitUpdate the WordPress configuration and default “apache2” host files so your website will be ready to accept connections:
# Rename the default index.html file that ships with apache2. This will be replaced with the WordPress file
mv index.html index.html.bk# Copy the template/sample WordPress config file so you can use this as a base for your own website
mv wp-config-sample.php wp-config.php# Add the details you created for the MySQL WordPressDB database using nano
nano wp-config.php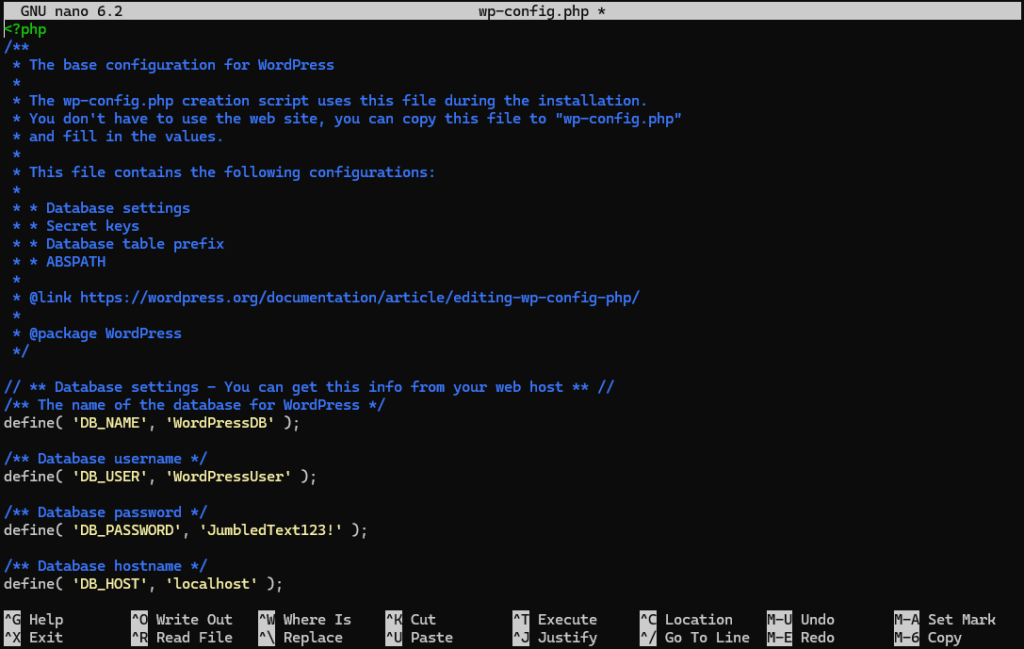
wp-config.php file will look something like this, except of course with your own MySQL user and password.Next, give the “www-data” user access to the folder so WordPress plugins will function properly later
# Add your local "ubuntu" user to the www-data group
sudo adduser $USER www-data# Change ownership of the "/var/www/html" directory/folder and all the subitems to the www-data user group
sudo chown -R www-data:www-data /var/www/html# Update the permissions of the "/var/www/html" directory/folder to allow reading & writing
sudo chmod -R g+rw /var/www/htmlNow you need to restart apache2 one final time to apply all the changes you just made, and finally bring your website online.
# Restart the apache2 service to allow it to start with all the website configurations you did in the prior steps
sudo systemctl restart apache2
With all this set up, you have completed building the backbone to host your own website.
- You have a cloud server with an internet connection and a firewall that allows incoming connections for website traffic
- You have apache2 and MySQL installed to host your website
- You have a domain/website name that gets updated dynamically (in 10 minute intervals) if the IP ever changes
- You have deployed the website files and told the website how to connect to your MySQL database
You are just 2 steps away from hosting your own website.
Step 7: Securing WordPress with SSL
Use the Let’s Encrypt certbot to allow only secure SSL connections with encrypted traffic to your website:
# Install the certbot and its dependencies.
sudo apt install certbot python3-certbot-apache# Instruct the certbot to request the certificates from Let's Encrypt and install them to your apache instance, as a bonus it will set up the redirects as well, so if someone types http:// it will redirect to https:// automatically
#Take care to replace example.com & www.example.com with your own domain/website name, otherwise the command will fail.
# Also add an email box that is ok with receiving spam, you do not want to be advertising your personal email address to the whole internet
sudo certbot --apache --agree-tos --redirect --uir --hsts --staple-ocsp --must-staple -d example.com,www.example.com --email you@example.comThis last command will let the certbot request a certificate, install it for your website, set up a redirect so connections are always SSL enabled, and agree to the terms of service of Let’s Encrypt on your behalf.
Let’s Encrypt is an amazing service that is run as a non-profit initiative to make the internet a safer place. It is trusted by many as the Internet Certificate provider of choice. They are also sponsored by nearly all the internet giants and many more organisations.
You can verify that this is working as expected in the next step when you first open the website. It will look something like this (depending on your browser):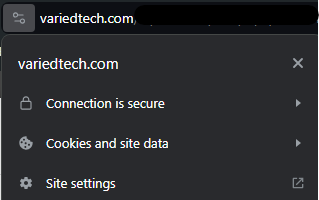
Your website is now secured by an SSL certificate that will automatically renew itself. You have just one more step to go!
Step 8: Accessing Your WordPress Website
Finally, you need to complete the website setup by going to your website’s installation screen: https://example.com/wp-admin/install.php
Replacing example.com with your own domain/website name of course.
and following the instructions on the screen.
After successfully installing WordPress, you can access your website in two ways: as an administrator and as a regular user.
As an Administrator:
- Access the Admin Dashboard: To manage your website, you need to access the WordPress admin dashboard. You can do this by adding
/wp-adminto the end of your website’s URL. For example:https://yourwebsite.com/wp-admin. - Log in with Admin Credentials: Use the username and password you created during the WordPress installation process to log in. If your hosting provider set up WordPress for you, they might have provided you with these credentials.
- Explore the Dashboard: Once logged in, you’ll be taken to the dashboard where you can configure settings, create new posts and pages, install plugins, customize themes, and more.
As a Regular User:
- Visit the Website URL: Simply enter your website’s domain name into the browser’s address bar. For example:
https://yourwebsite.com. - Browse the Site: As a visitor, you can browse the website, read posts, navigate through pages, and interact with the content.
- User Registration (Optional): If user registration is enabled by the admin, you can register for an account on the website to comment on posts, receive updates, or access restricted content.
Remember, as an admin, you have the ability to manage user roles and permissions, which determines what registered users can and cannot do on your website.
By following these steps, you should be able to access and manage your WordPress website both as an admin and as a user. Enjoy building and customizing your new website! If you need further assistance or have any questions, feel free to reach out. 🌐🔧
Conclusion
You have now set up a self-hosted WordPress server on Oracle Free Cloud, complete with SSL and dynamic DNS updates. Regular updates and maintenance are critical to keep your server secure.
To recap:
- You have a cloud server with an internet connection and a firewall that allows incoming connections for website traffic
- You have apache2 and MySQL installed to host your website
- You have a domain/website name that gets updated dynamically (in 10-minute intervals) if the IP ever changes
- You have deployed the website files and told the website how to connect to your MySQL database
- You have secured your website connections with an automatically renewing SSL certificate using the Let’s Encrypt service and certbot
- You have completed the installation steps of WordPress and can now sign in as an Administrator and/or regular user to your own website.
Great work! Have fun customising your own website.
References
As part of my own journey setting up everything as detailed above. I consulted several other blogs and instructions from the internet. Without these references getting all the information would’ve been far more painful. So, if you’d like more information around any particular topic, these would be great places to start.
- https://docs.oracle.com/en-us/iaas/developer-tutorials/tutorials/wp-on-ubuntu/01-summary.htm
- https://www.linuxbabe.com/ubuntu/https-apache-letsencrypt-ubuntu
- https://www.instructables.com/Quick-and-Dirty-Dynamic-DNS-Using-GoDaddy/
Other references and services mentioned in this article:
